
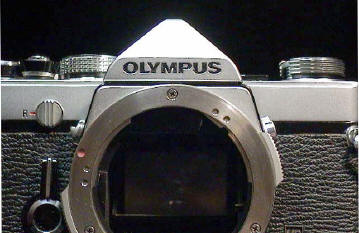
| Such a low-profile body
can't leave much room for certain essentials such as the meter coil and
the slow speed escapement. This particular body came in with a sticky shutter at 1/8th of a second. The slow speed unit is hidden out of the way underneath the floor of the mirror box. The original m39 Leicas also have their escapements down here and this is just one of the several things that Maitani (and so many others) lifted from the design of those classics. |
A nice Maitani fan site is here and for real OM stalkers, there's this little distraction here. |
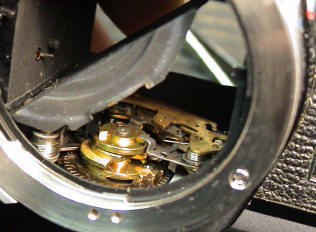
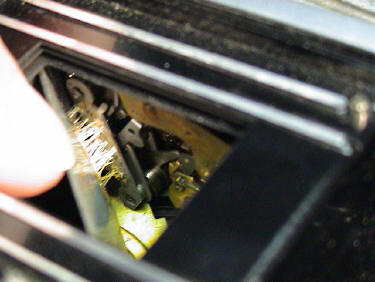
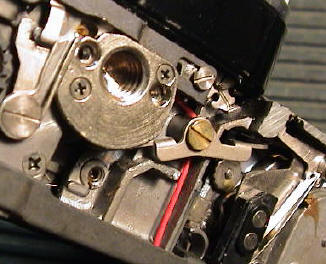
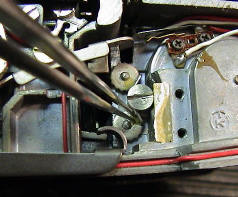
| So, how do you
get at it? By carefully lifting out the plate here. The plate is held in place with contact cement primarily on the left hand edge - when looking into the chamber from the front. Open the shutter and look in from the rear and we can
see the camera designers equivalent of a programmers "bug". This
screw does not hold the cover in place. In fact, it holds a ball
bearing cage in place underneath the cover. If you remove it, you
run the risk of releasing the balls, so leave it in place. Why is this a "bug"? Because it is clearly not there by design, but rather through not allowing for this part to be under the cover like everything else. Maitani will probably have said "Oh ****!!" when he first got the production shutter parts in hand. The only way around it was to put an otherwise unnecessary hole in the cover plate. This is of course dealt with properly in later revisions of the OM1. |
![]()
![]()
![]()
![]()

![]()
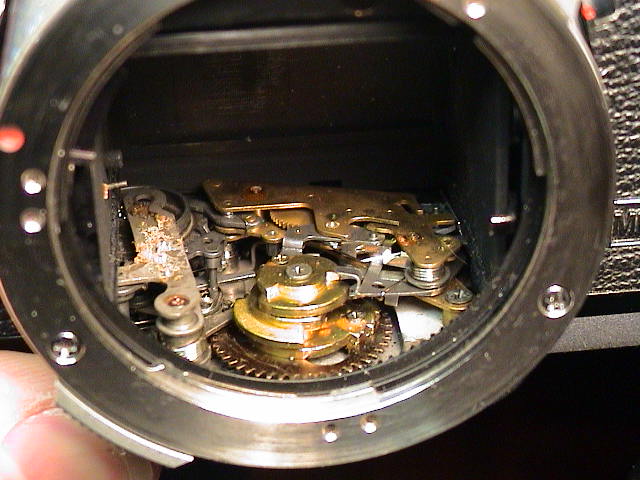
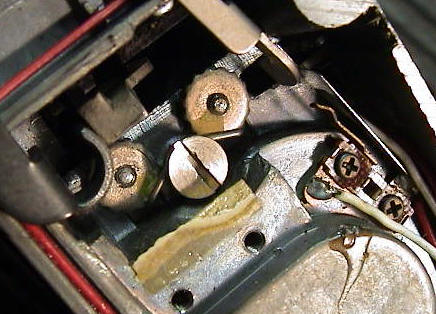
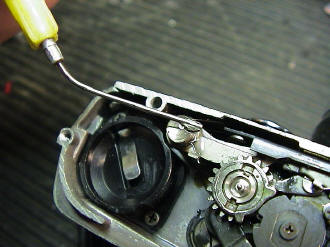
| Here we can see
the shutter speed mechanism exposed and almost ready for work.
Just a few quick notes on some of the things in here. Yellow
arrows are pointing to just a couple of the bearings (surfaces) that
need to be flushed and lubed. Look for more nearby once you're in here.
Before proceeding with flushing, remove the bottom cover of the camera.
Blue is pointing to the adjusters for the pressure of the escapement mechanisms.. there are two here. One for 1 and 1/2 seconds and the other for 1/4, 1/8th and possibly 1.15th... (I'd have to pull it apart again and check) In any case, trust the factory and don't mess with these unless all else fails. Green is pointing to where the lever is resting on the master speed-selector cam. This is the 1/8th setting. The next step involves flushing these bearings with white sprit whilst operating the shutter at various speeds to clear out caked and dried lube. Compressed air can also be handy, with care of course. Once everything's running smoothly, lube where appropriate according to your own beliefs as a service technician. I'll describe it in detail elsewhere some time, but keep it light where speed is important, dry-ish where surfaces differ and only use a lubricant with any sort of graphite ingredient if surfaces are under load or actually damaged. Flooding these mechanisms with solvent full of graphite powder is quite insane and should never be done outside of battle-field conditions. Anyway, more about lube some other time. |
![]()
![]()
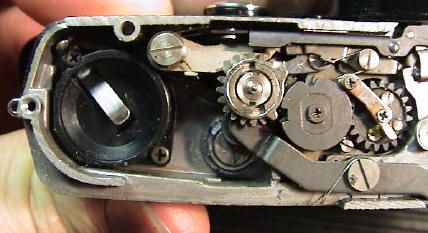
| At the other end
to the right we have the shutter blind spring tensioners (yellow). Another thing to check every time you take the bottom off an OM (or any) camera is the tightness of the tripod bush. More often than not, it is loose. |
![]()

| At the other end
to the right we have the shutter blind spring tensioners (yellow). Another thing to check every time you take the bottom off an OM (or any) camera is the tightness of the tripod bush. More often than not, it is loose. |
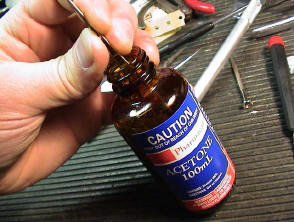
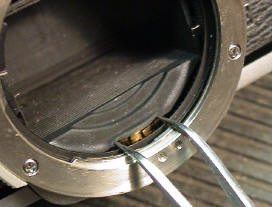
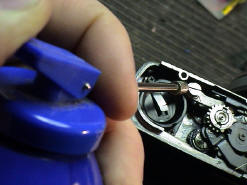
| This is how I
like to place a tiny amount of solvent somewhere delicate. I use a
pair of long an thin tweezers to grab a droplet straight from the bottle
and can then carefully place it without getting it all over the rest of
the interior.
Acetone is being used here to loosen up the rubber cement on the blind tension adjusters. Note: Be extremely careful with acetone as it will mark and damage most plastics and some paintwork used on cameras. |
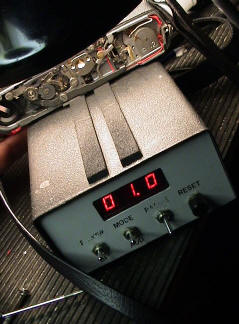
| That's exactly
where 1/1000s should be on my home made test gear :). Once the
shutter is flushed and lubed, I can set about adjusting the shutter from
it's most-likely-worn areas down. In this case, the blind tension
is the first thing to play with since the speeds that rely on tension
were off by a similar percentage.
After bringing the 1000ms down from 1300, the 500 and 250 fell into place. From there I went straight up to 1ms which was by now capping, so with a bit of tweaking, that was brought down to a good 1-1.3 ms The rest all fell into place as the case should be when a shutter has not been messed with before. Lesson: If you think you have to physically modify a part to get a shutter back in time, then you've probably missed something. Go back and start again. You'll be glad you stopped yourself filing or bending anything unnecessarily. That said, there are some lens-shutters that are simply not made to be adjusted as they wear. The Mamiya RB lenses are like that. You will have to get new springs or a new escapement for those. |
| Here I am
flushing lube and dirt once again from a few key points underneath the
body. White spirit is used and after a few shutter clicks I blow
it out with compressed air. The process gets repeated several
times if deemed necessary. This particular shaft does not usually get lubed again afterwards by me. There are no real load bearing parts and all levers on this piece must be fast and free for smooth winding operation. |
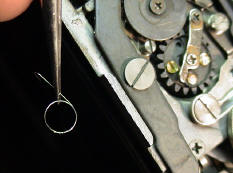
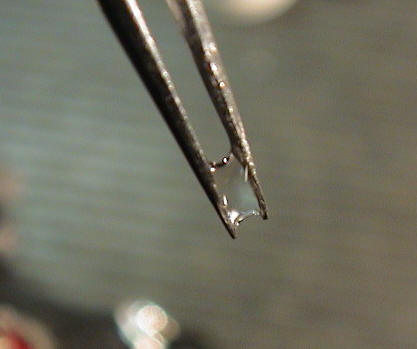
| Another common
though not debilitating problem with OM's is this little spring.
Now and then you'll find a broken one. Being an avid spring collector myself (arrgh!), I of course had a replacement ready to hand in my box-o-bits.. The final step before reassembly and a clean-up was to add the thin felt strip (right) to the mirror box to hold the bottom plate in more securely. I lifted this little helper from the later OM bodies and find it useful in this early version. |

![]()

![]()
| Click here to return to Index |
All material Copyright Robert Ian Axford |
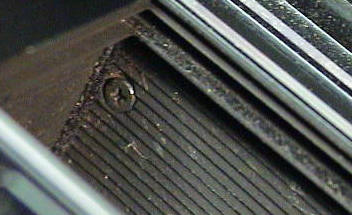
| Green arrow -
always check this plastic screw on every OM1 you get. It's often
broken and you may have to improvise to replace it. Metal won't do
unless you have a plastic sleeve. The red arrow points to the shutter curtain bump stop. Sometimes bent, which will cause the teeth to lock with the gear to the left of it. Also watch for missing rubber on this pin. |